
Introduction
Generating a single AI image that looks good is one challenge. Generating ten images that all look like they belong together is a different one.
That second challenge – visual consistency across a series – is one of the most practical problems in AI image production. When you are building a course, running a content campaign, or creating a social media set, your images need to share a coherent visual identity. Without a structured approach, each prompt tends to produce something that looks slightly off from the last. The color palette shifts. The lighting changes. The mood drifts.
This article shows you two techniques for reducing that variation: style anchoring and prompt templates for visual series. Both come from Chapter 7 of the Learning Prompt Engineering eBook. Neither eliminates variation entirely – visual AI tools produce probabilistic outputs, not deterministic ones. But both provide a repeatable structure that tends to yield more consistent results across a production set.
By the end of this article, you will know how to build a style anchor block, how to structure a reusable prompt template, and how to apply both across a real content set.
Why Visual Consistency Is Hard to Achieve
Visual AI tools do not store your preferences from one prompt to the next. Every prompt is processed independently. The tool has no memory of the image you generated five minutes ago.
That means every time you submit a new prompt – even one that is nearly identical to the last – the output can vary. A slightly different word order. A missing modifier. A change in subject. Any of these can shift the colour treatment, the lighting quality, or the overall visual style of the output.
The result is a set of images that feel inconsistent. They may all be technically competent. But they do not feel like they were made for the same project.
The solution is not to hope the tool produces similar results. The solution is to build the consistency into your prompts – deliberately and systematically.
What You Need Before You Start
Before applying either technique, you need three things in place:
- A clear definition of the visual style you want for your series. This means making decisions about style type, color palette, lighting, mood, and format before you write a single prompt.
- A defined subject scope. Know how many images you are producing and what each one needs to depict. A course set of eight lesson headers, for example, is a clearly bounded scope.
- A test image. Run one prompt through the tool before committing to the full series. Adjust your style decisions based on what the test produces, not just what you imagined.
These three steps set up both techniques correctly. Skipping them – especially the test image step – often leads to producing a full series and then realizing the style decisions were off from the start.
Technique 1: Style Anchoring
A style anchor is a fixed block of modifier language that you include in every prompt within a series. The subject of each prompt changes. The style block remains identical across all images in the set.
Style anchors work because the modifiers that define visual appearance – style type, colour palette, lighting, mood, aspect ratio – are the same properties you want to keep consistent. By locking them in a block and repeating that block verbatim, you give the tool the same visual instructions for every image.
Building a Style Anchor Block
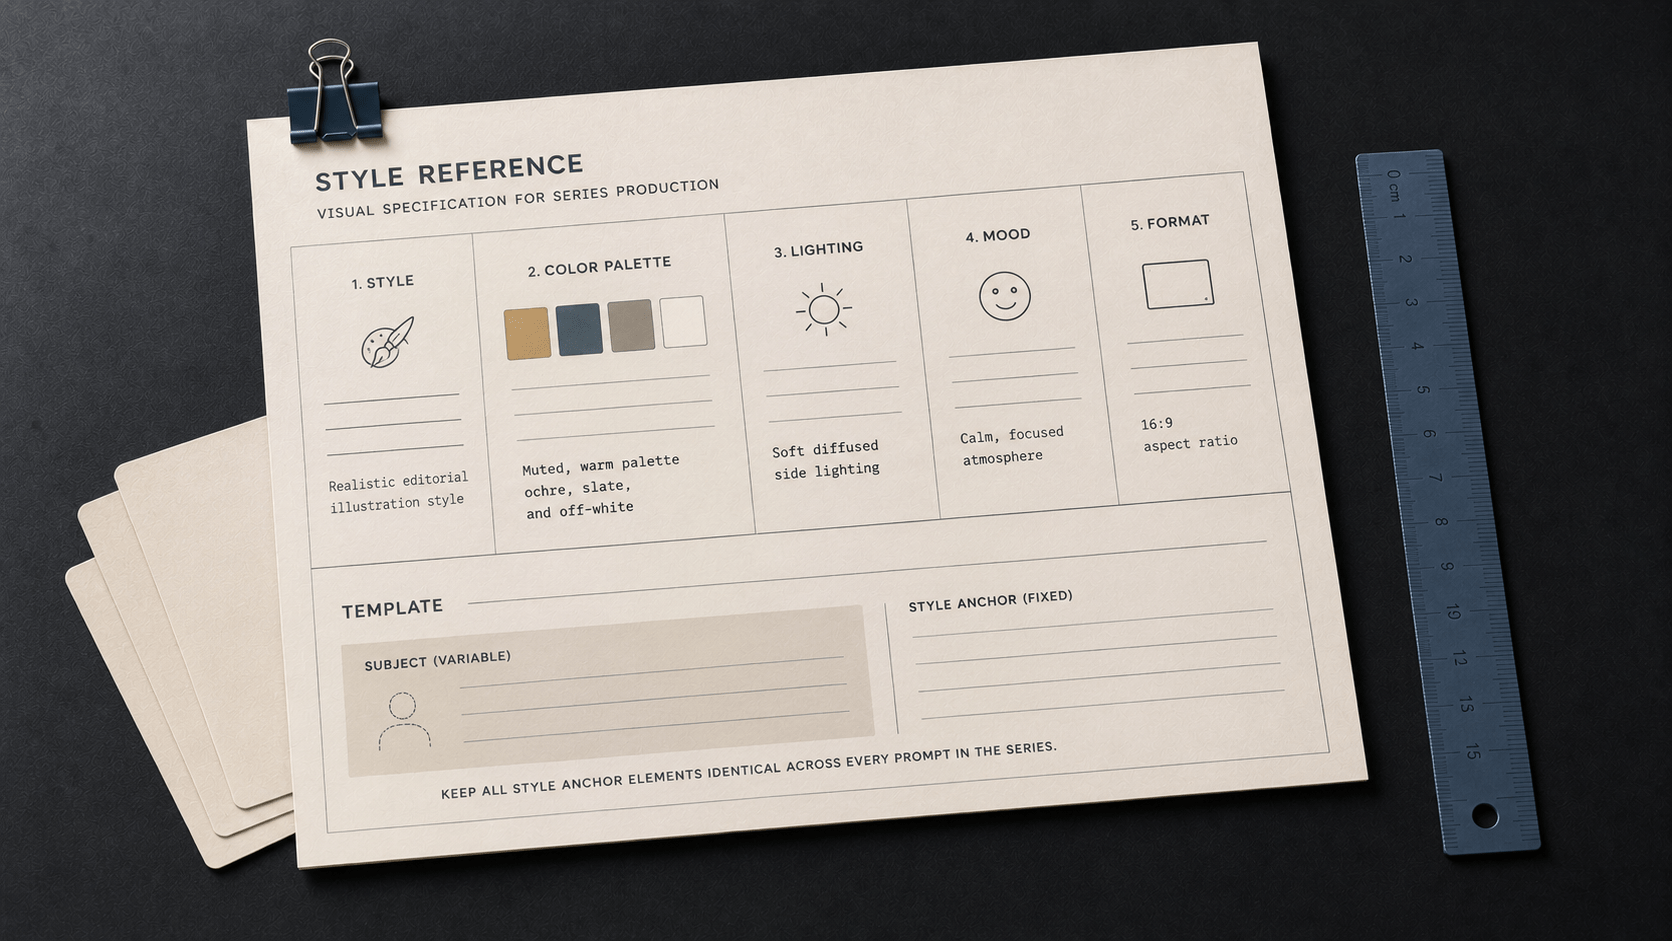
A style anchor block typically covers five properties:
Style type – the artistic or photographic treatment. For example: editorial illustration, flat design, cinematic photograph, or documentary photography.
Colour palette – the primary colours and their quality. For example: muted warm tones in ochre, slate, and off-white. Avoid vague terms like ‘neutral’ or ‘natural’ – be specific.
Lighting – the quality and direction of light. For example: soft diffused side lighting, harsh directional overhead light, or golden-hour backlight.
Mood – the emotional register of the image. For example: calm and focused, tense and dramatic, or warm and approachable.
Aspect ratio – the format of the output. For example: 16:9 for course headers, 1:1 for social posts, 4:5 for Instagram.
Here is an example of a completed style anchor block for a professional development course:
| Prompt | Realistic editorial illustration style. Muted, warm colour palette – ochre, slate, and off-white. Soft diffused side lighting. Calm, focused atmosphere. 16:9 aspect ratio. |
Applying the Style Anchor Across a Series
Once your style anchor block is written and tested, attach it to every prompt in the series. The subject changes. The style anchor block does not.
| Prompt | A person presenting to a small group in a modern meeting room. Realistic editorial illustration style. Muted, warm colour palette – ochre, slate, and off-white. Soft diffused side lighting. Calm, focused atmosphere. 16:9 aspect ratio. |
| Prompt | A person reviewing data on a laptop at a standing desk. Realistic editorial illustration style. Muted, warm colour palette – ochre, slate, and off-white. Soft diffused side lighting. Calm, focused atmosphere. 16:9 aspect ratio. |
| Prompt | Two colleagues collaborating over printed documents at a shared table. Realistic editorial illustration style. Muted, warm colour palette – ochre, slate, and off-white. Soft diffused side lighting. Calm, focused atmosphere. 16:9 aspect ratio. |
The style anchor does not guarantee identical outputs. Visual AI tools produce probabilistic results – the same prompt can produce different outputs on different runs. But a consistent style anchor tends to reduce variation significantly across a series, making the assets feel like part of the same visual system.
One note: copy the style anchor block precisely, character for character, across every prompt. Even small differences in wording can shift the output. If you find that a particular phrase is not producing the result you want, update the style anchor block, test it, then apply the updated version uniformly across all remaining prompts.
Technique 2: Prompt Templates for Visual Series
A prompt template is a reusable prompt structure where only the subject slot changes across a series. Every other element – the style, lighting, mood, aspect ratio – is fixed in the template itself.
A prompt template is essentially a formalized version of the style anchor approach. The difference is structural: rather than maintaining a separate style block that you paste into each prompt, you build a single template and fill in the subject variable for each image.
Building a Prompt Template
A basic prompt template for a visual series looks like this:
| Template | [SUBJECT]. [Style type]. [Colour palette]. [Lighting]. [Mood]. [Aspect ratio]. |
Here is that template filled in with fixed values for a course visual series:
| Template | [SUBJECT]. Realistic editorial illustration style. Muted warm colour palette – ochre, slate, and off-white. Soft diffused side lighting. Calm, focused atmosphere. 16:9 aspect ratio. |
To use the template, you fill in the [SUBJECT] slot for each image and leave everything else unchanged.
Using the Template Across a Series
Here is how the same template produces four images for a social content campaign:
| Prompt | A barista preparing an espresso at a coffee bar. Realistic editorial illustration style. Muted warm colour palette – ochre, slate, and off-white. Soft diffused side lighting. Calm, focused atmosphere. 1:1 aspect ratio. |
| Prompt | A person reading a book in a quiet corner of a cafe. Realistic editorial illustration style. Muted warm color palette – ochre, slate, and off-white. Soft diffused side lighting. Calm, focused atmosphere. 1:1 aspect ratio. |
The subject changes. Every other element stays fixed. This is the core logic of both techniques: treat the style decisions as constants, not variables.
Template vs. Style Anchor: Which to Use
Both techniques serve the same goal. The difference is in how you manage them:
- Use a style anchor block when you are working from existing prompts and want to add consistency without rebuilding them. Paste the block at the end of each prompt.
- Use a prompt template when you are starting a new series from scratch. The template makes the structure explicit and reduces the chance of accidentally changing a value mid-series.
In practice, many content producers use both: a prompt template as the primary structure, with the style anchor block documented separately as a reference. This gives you a working template and a record of the exact style decisions you made.
Common Mistakes and How to Avoid Them
Changing the style block mid-series
The most common consistency failure happens when a style anchor block is updated partway through a production set – often to fix a result that did not look right. Updating the block is sometimes necessary. But if you apply the updated block only to the remaining prompts, the earlier images and the later ones will look different.
Fix: If you need to change your style block, go back and regenerate the images that used the original version. That adds time, but it maintains consistency across the full set.
Using abstract language in the style block
Style anchors fail when they rely on vague descriptors. Terms like ‘modern,’ ‘clean,’ or ‘professional’ are too abstract. Different tools – and even the same tool on different runs – tend to interpret them differently.
Fix: Replace abstract terms with specific visual language. Instead of ‘modern colour palette,’ specify ‘muted blue-grey tones with off-white backgrounds.’ Instead of ‘clean layout,’ specify ‘minimal composition with generous negative space.’ Specificity reduces the range of possible interpretations.
Skipping the test image
Committing to a full set of prompts without testing the style anchor first is a common time cost. If the style block produces an unexpected result, you may need to regenerate the entire series.
Fix: Run one test prompt before starting the series. Evaluate the output. Adjust the style block if needed. Then run the full set. That test image saves significantly more time than it costs.
Step-by-Step Workflow: Building a Consistent Visual Series
This workflow applies both techniques together. Use it as a checklist for any AI image series you produce.
Workflow Checklist
- Step 1: Define your series scope. List every image you need: subject, purpose, and format. Before writing a single prompt, know exactly how many images the series contains and what each one depicts.
- Step 2: Make your style decisions. Choose style type, color palette, lighting, mood, and aspect ratio. Write them down. These decisions become your style anchor block.
- Step 3: Build your style anchor block. Write the five modifier values as a single, clean block. Keep the language specific and visual.
- Step 4: Build your prompt template. Insert the style anchor block into a template structure: [SUBJECT] + [style anchor]. This is your working template for the series.
- Step 5: Run a test image. Fill in the [SUBJECT] slot with one of your planned subjects. Generate the image. Evaluate it against your style expectations. Adjust the template if needed.
- Step 6: Generate the full series. Fill in the [SUBJECT] slot for each image. Copy the template exactly – do not paraphrase or reorder. Keep the style anchor values identical across all prompts.
- Step 7: Document what worked. After the series is complete, save the final style anchor block and template. If you need to produce additional images later – or a similar series for a different project – you have a tested reference to start from.
Key Takeaways
- Visual AI tools produce probabilistic outputs. Without a structured approach, even similar prompts can produce images that look inconsistent across a series.
- A style anchor is a fixed block of modifier language – covering style type, color palette, lighting, mood, and aspect ratio – that you attach to every prompt in a series. The subject changes; the style block does not.
- A prompt template formalizes the style anchor into a reusable structure with a single variable slot for the subject. Both techniques reduce variation without eliminating it.
- Specific visual language in the style block tends to produce more consistent results than abstract terms. Describe what you want visually, not conceptually.
- Test one image before committing to a full series. The test step is the fastest way to identify style adjustments before they affect the entire production set.